
I installed the overdrive gearbox a couple months ago, and it leaks out the bottom cover. I took it apart with it in the car. Had to pull the exhaust, and put it up on jackstands, using two for safety. It turned out that while it was a bit of a pain to lay on my back scraping the gasket sealer, it was possible without pulling the gearbox, and quicker.
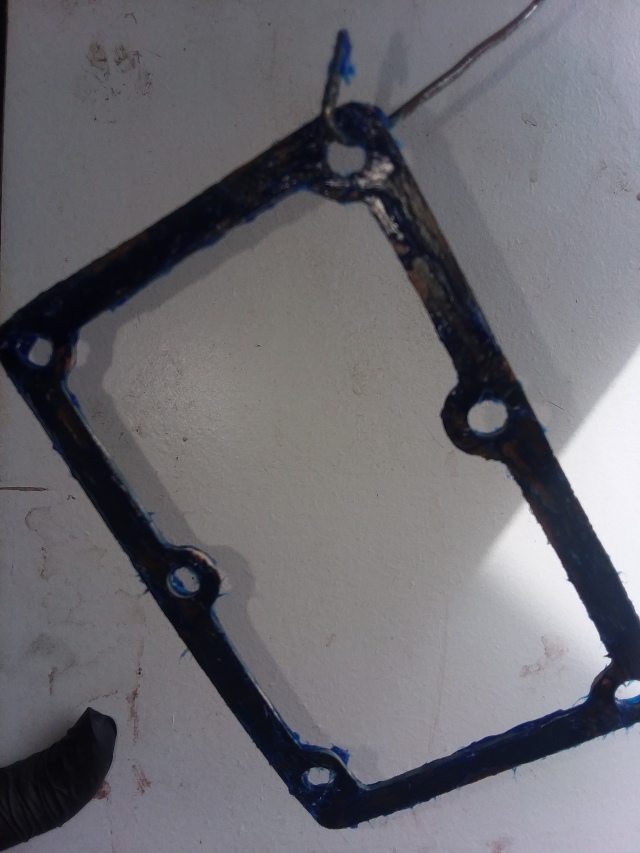
From under the car I pulled the cover. There was no sealant on the cover side of the gasket, and the gasket was broken. Thus the big leak.. I got a new gasket from Spitbits. After some research I decided to use Blue Hylomar, as being the most reliable leak proof sealant for oil. Didn’t have any in any local store, so I decided on the Permatex Equivalent, their Permatex Permashield Fuel Resistant product.

The steps I took:
- Remove exhaust from the rear up to the joint just beyond the OD cover
- Removed gearbox drain plug, let oil drain. Removed cover, let oil drain. Both overnight.
- Dressed cover using a piece of 400 grit wet dry on a flat surface till evenly shiny, all low/high spots even, perfectly flat, all scratches/gouges removed.

- Cleaned the old gasket off the underside of the OD mating surface. I used about 5 plastic knives as they kept breaking, (nothing special, just like plastic forks, spoons…). I used plastic so as to not scratch/gouge the aluminum. The knife edge also was helpful in scraping off the old hardened sealer. I also used some lacquer thinner on a paper towel to soften the old sealer occasionally.
- Dressed the mating surface on the bottom of the OD gearbox the same way as the cover. I used a piece of 400 grit wrapped around a small length of aluminum angle instead of a flat surface, cleaned thoroughly with lacquer thinner.
- Spread Permatex Permashield on both sides of the gasket only, not on the aluminum surfaces. The datasheet says to put it on both mating surfaces. I chose to do only the gasket because I had read it gets all over the place, and is hard to spread. I didn’t want to get excess in the OD sump. It is hard to spread. And when you do, it only goes on really thin, so I am hoping that the fact I dressed the two mating surfaces of the gasket only allows for a sufficient thin layer.
- Let it flash off. The instructions say to let the solvent evaporate. The online datasheet says you can tell it is finished evaporating when the odor is gone. It took about twenty minutes for the acetone odor to go away. I then took a screwdriver and cleared the bolt holes in the gasket.
- Cleaned the cover with Purple Power, rinsed, then cleaned with lacquer thinner.
- Cleaned the screen filter that was under the cover.
- Cleaned the underside mating surface with lacquer thinner using a paper towel.
- Install and torque first time. According to the directions, retorque after ten minutes.
- Retorqued, and here it is installed. I am encouraged that a little bit of the sealer has squished out, so I must have a thin layer on the whole surface.
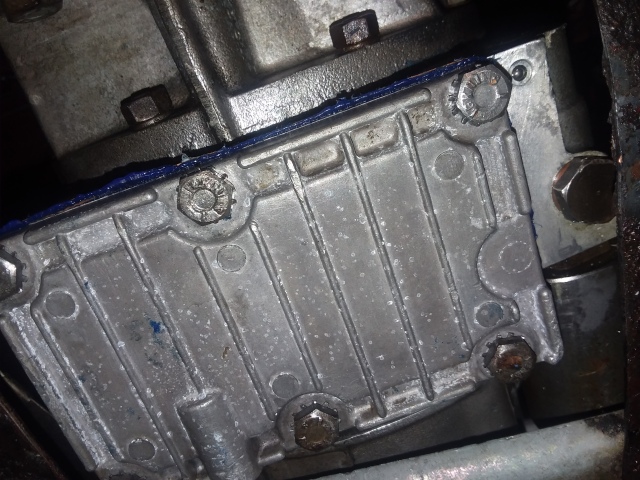
- So now I have to give it 24 hours to fully cure before adding oil back into the gearbox. I am hoping at this point that my not having put sealer on the aluminum surfaces does not come back to bite me.

So it is a few days later. The gearbox still leaks a ounce or two every time I park it after driving. So I decided to try UV dye to find the leak. My gearbox capacity is 44 oz, so I used 1/4 oz of the die. I used a long clear vinyl tube with suction pulled out the 1/4 oz, and inserted the tube into the gearbox fill hole and let it drain in.
I drove for about 15 minutes, then parked in the garage. My UV light is a cheap one I bought at a local hobby store. Here are the pictures.


The first two pictures show the top cover, drivers side front is leaking badly. The third picture shows the oring on the rod is leaking slightly. The last shows the passenger side rear is doing ok. I didnt take a picture of the passenger side front. It showed dye around the fill plug, from putting it in I suspect.
This dye is cool!
So I tightened the bolts on the top cover and went for a 10 minute drive. This got all of the top cover leak except for around the locating bushing/pin at the very front.

So I pulled the top cover, cleaned everything up, wet sanded the cover a on a flat surface, and coated all surfaces including both sides of the gaskets with hylomar. I let it flash off for 20 minutes and assembled. Retirqued after 10 minutes. Waited 24 hours for final cure, and took it for a test drive. No leaks dripping, and all the dye on the transmission looks like old trace that I didn’t quite wipe off from before. The drain plug is still leaking a tiny bit. I did not seal it with the hylomar. I believe I used the permatex white thread seal. Next time I drain it I will use hylomar on the plug.
